HomeMy WebsiteAbout mePocket PatchworkFreebie Patterns

Sunday, October 30, 2011

Continuing with Journey Three

Thanks to everyone who took the time to comment!  I loved reading about all of your favorite blocks.  It turns out they're mine too, as they were all the traditional blocks with the good 'ol Nine Patch taking the lead as most popular.  There's just something about this classic, simplistic block that we all love. 

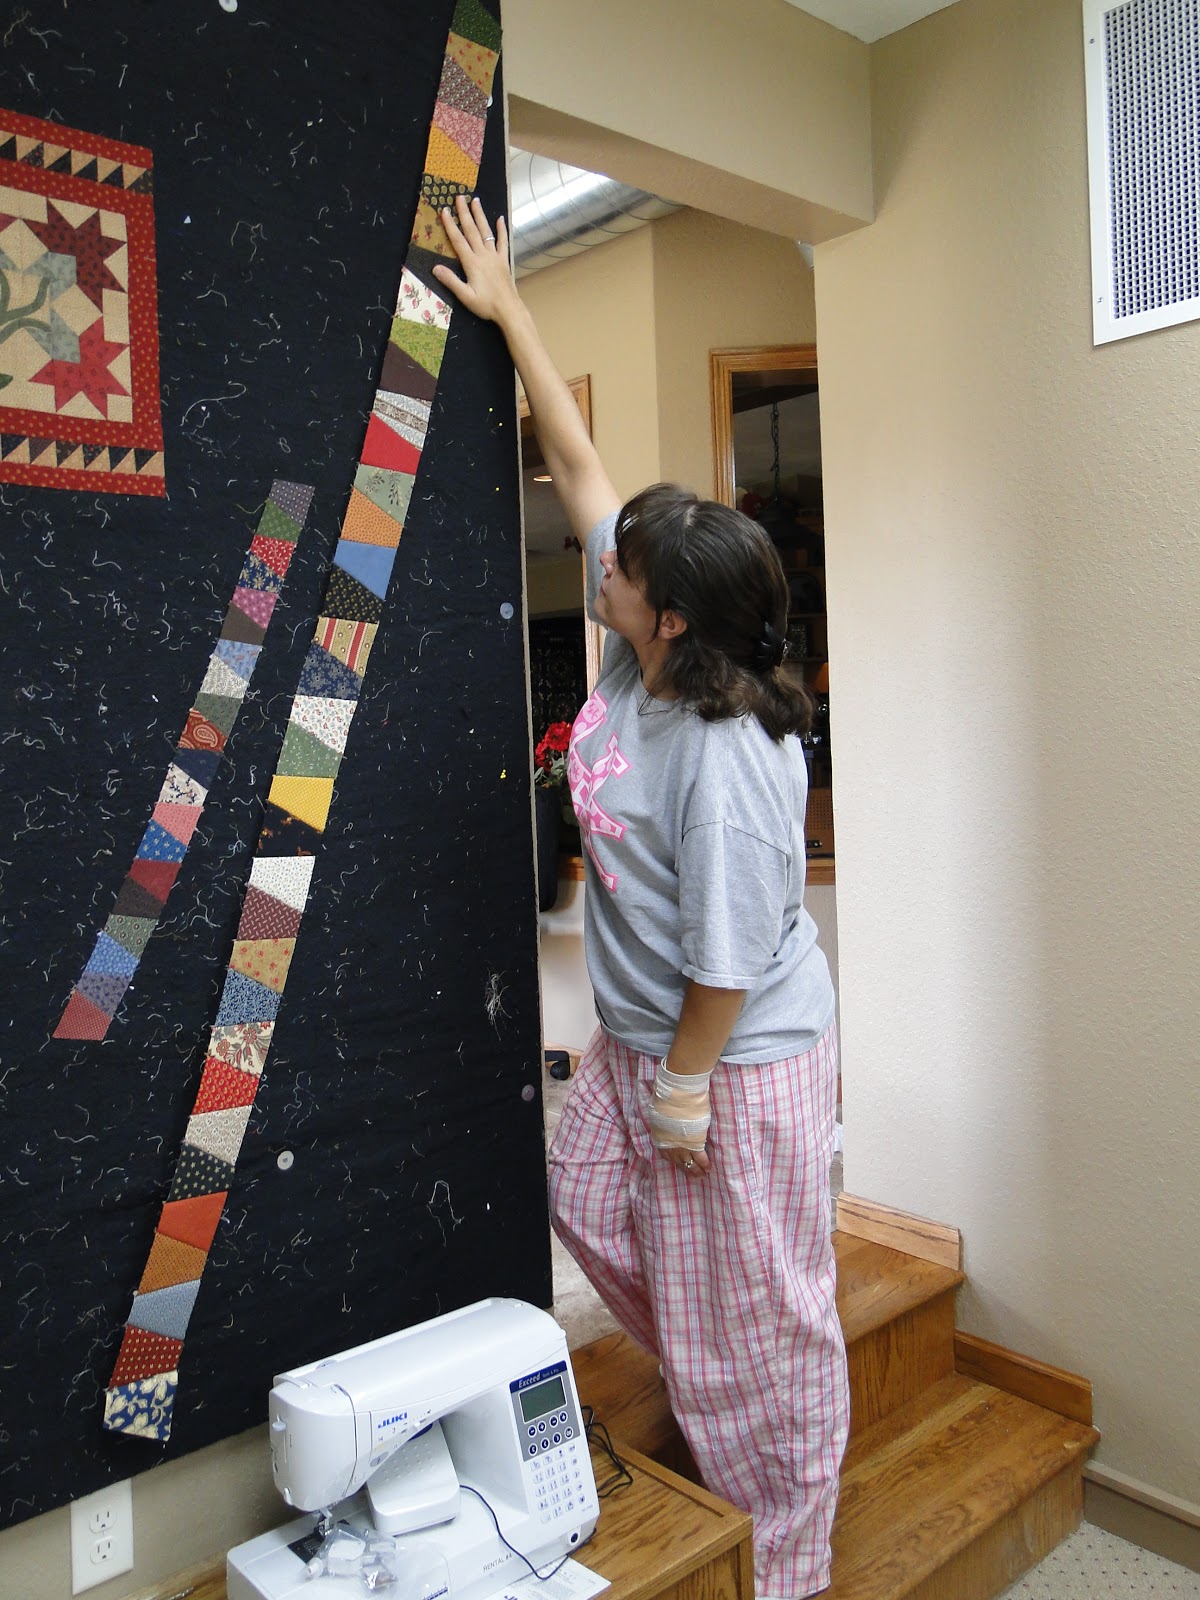
Running very close seconds were any type of star block (who doesn't love stars??!), Four Patch, Churn Dash, Log Cabin, and Basket blocks.  I adore basket blocks, too, and have been very enamored with the Odds & Ends block of late (which I used in the 5th quilt for Journey 3).  I have to admit that, lately, I'm very drawn to anything that presents a piecing challenge.  Some of my friends and I signed up to take a Dear Jane class, and I love that because it combines two of my favorite things....a sampler quilt, and small blocks (finishing to 4.5 inches!).  Dear Jane allows me to use a bevy of quilting skills, and the opportunity to learn new ones.  For instance, I stitched my first hand pieced Dear Jane block this month.  Here's a photo of how it turned out.


Hand piecing is wonderful...not nearly as hard as I had imagined.  Not surprising, it's all about the hints and tips that make the job easier, and you get those hints and tips from attending classes!!  Never stop taking classes!!  (Are you surprised I chose to make a red and light print Dear Jane??)

On to the important news.....the winner of the Windy Hill Farm quilt kit is.........Karen W. who says...

My favorite blocks are the Ohio Star, Churn Dash and 9 Patch. Love, Love, Love Journey 3. Thank you so much for all your hard work and creativity! I look forward to reading your blog every day. Karen W.

Congratulations, Karen W!!  I'll send you an email and get your kit out to you right away!!

Quilt 3 ~ Lockridge Mill


I love the simple design of the Lockridge Mill quilt with it's bands of Flying Geese.  Like the Nine Patch blocks we love so well, there's something wonderful about how graphic and stunning those triangles are, all "flying in a row".  I think this quilt, made large or small, is a "must have" in the collection of a traditional quilter.  I really love the border fabric (Cocheco Mills collection by Judie Rothermel for Marcus Bros.) as it looks so very vintage to me, and am very happy with the way it turned out.  While I was making this quilt (which took only 3 hours), I thought it would look great made with a variety of scraps too, so I'm sure I'll be making another one.  When?  Hhmmmm.

Hoping you like the Lockridge Mill quilt with its Flying Geese and red ~ green fabric combination, and if you do, please comment for a chance to win a kit of the exact fabrics I used.  Tell me what fabric color combinations you love the most, and post your comment by midnight, Tuesday, November 1st.  I'll post the winner on Wednesday and show you quilt number four. 

Until then......Pam

P.S.  Cathy left a good comment asking for clarification about what the Prairie Women's Sewing Circle is all about.  I apologize, Cathy!  I get to thinking that everyone already knows!  My bad :-(

The PWSC is a monthly club, best experienced at a quilt shop.  Each Journey lasts for 6 months and Journey Three is about to be released.  While attending the club, you do a little hand sewing of either Yo-yos or hexagons, depending on what Journey the shop is running, receive anecdotal stories about what life was like for American "Prairie Women" in the 1800's, and receive monthly patterns for do-able, affordable quilts that also teach you about Making-Do.  Many shops offer the club through the mail.  If you would like more information about the club, visit my website, and/or email me for a list of participating shops in your state.  Better yet, tell your favorite shop owner about the club.  A lot of them don't know anything about it!! 


Friday, October 28, 2011

Take a look at Journey Three!!

At long last!!!!!  I am ready to show you the quilts for Journey Three!!  It feels soooo good!!  (Pardon my over use of exclamation points, but I really needed to do it.  Teehee!!) 

There are two big changes to Journey Three and I hope you like them. 

First, we are changing our hand sewing project from Yo-yos, which I still adore, to hexagons, which I absolutely love!!  I wanted to keep things fresh and fun, and boy are those hexagons fun!!  To buy a Hexagon Starter kit, including a finished sample hexagon, click here.

Secondly, I am adding alternate sizes for all of the quilts.  In my own Prairie Women's group, we talk about how some of us (me included) love small blocks....but not everyone does!  I don't want anyone to feel left out, so I decided to offer alternate sizes, giving options.  In this way, I hope there's something for everyone.

Quilt One ~ Contrary Wife


We start our Journey with this quilt called Contrary Wife.  This is a replica of an antique quilt that I own.  I've always loved the reel block and thoroughly enjoyed every moment making this quilt.  There are three alternate patterns for the Contrary Wife (two with no applique)!  This is the only lap/throw size quilt in the series.   The quilting on this quilt is stunning.  I can say that 'cause I didn't quilt it!

Quilt Two ~ Windy Hill Farm


I never get tired of the classic double pink and indigo blue fabrics!  This is an easy quilt to make featuring our most traditional blocks - the Nine Patch and Pinwheel. I love the motion the
Pinwheels give the quilt without over taking it.  I had a great time choosing the fabrics for it, too.
And when I did....I cut a kit one for one lucky quilter to win!!

As promised, it's time for our Journey Three kit contests to begin!!!  Yay!!

To enter, leave me a comment about your favorite blocks, and/or your least favorite block, and why.  It is very helpful if you include your email address in your comment.  Be sure to comment by midnight, Saturday, Oct 29th.  I'll choose a winner for the Windy Hill Farm kit (which includes the Windy Hill Farm pattern) on Sunday.

There will be three more kits coming, so visit often!

Good Luck!!  Pam

P.S.  Lynne Hagmeier and I have received news that our quilting cruise to Alaska is beginning to fill nicely!  We'd love for you to join us on The Great Girlfriend Get-Away!!  Don't forget to check out our cruise brochure.....click here!

Tuesday, October 25, 2011

Loving Scrappy Quilts!

Do you love scrappy quilts?  I'm crazy for scrappy quilts!  I think it's because I love fabric, and making scrappy quilts gives me the opportunity to include tons of the fabrics I love.  It also allows me to play with fabric I'm not so crazy about.....dare I say "ugly" fabric.  In the mix of scrappy heaven, you can use an "ug" here and there, and then it's not so bad.  I'm trying to warm up to using some of the reproduction standards that I'm not so crazy about, such as poison green, chrome yellow, and cheddar.  I've begun using cheddar, although I'm choosing pieces that aren't very bright, prompting my friends to say that, techinically then, it's not cheddar at all.  Sigh.  I'm trying!  I did make a few cheddar, poison green, and chrome yellow hexagons, but in the end, I only used a few of them.  Baby steps...OK! 

For those of us madly in love with scrap quilts...have I got a book for you!


This awesome book contains patterns for 29 quilts, chosen by the editors of American Patchwork & Quilting magazine as their favorites!  There's a wide variety of styles from some of your favorite designers.  I'm very partial to many, whom I am very lucky to call my friend, such as Julie Hendricksen of J.J. Stitches, Kathie Holland of Inspired by Antique Quilts, and pal Tara Lynn Darr of Sew Unique Creations!  Oh...and I'm very honored to say I have three quilts in this book!!

Many of the patterns in this book were only available in the original magazine issues in which they appeared....until now!  That's true for two of my quilts....


Mix It Up, made in 1930's reproduction fabrics, features one of my favorite blocks, Jacob's Ladder.  It's such a simple block to piece, and puts on a big show!  Depending on how you postion the blocks, you get very fun secondary designs!  I'm also very fond of the playful border!


Scattered Leaves made the cover of American Patchwork & Quilting and has remained a favorite of quilters all over the world.  It's a favorite for me as well, not only because it was my first "Cover Girl", but also because two of my best friends dug into their fabric stashes and helped me piece this quilt!  It wouldn't have been the same scrappy-wonderful without them! 


Color Rich is a new version of my quilt Blueberry Pie.  The Color Rich version is constructed in the same way, but uses a palette of warm earthy toned fabrics, which are quite lovely!   Blueberry Pie, which is also pictured in the book, uses a wide variety of blue fabrics.

So...take my word for it.....if you're a scrap quilt lover, you'll want to add the Better Homes & Gardens Scrappy Quilt book to your library!!  Look for it at your favorite quilt shop, or you can order it from me by clicking here.

Thanks for stopping by!!  Pam

Sunday, October 23, 2011

Show-n-Tell from Me!

In my last post, I wrote about my recent visit to a quilting retreat, and told you how I brought three projects with me - quilts that I've wanted to make for myself, for our home.  In other words - no "work" projects for Heartspun Quilts.  The truth is, I brought a lot more than three projects....in case somehow I got to sew'n at the speed of light.  What could be worse than being at a retreat with all kinds of time to sew and nothin' to work on, right?  God forbid.  All in all, I was pretty happy with the progress I made with my Tumbler quilt, which is about half way finished now.  I have to trace and cut more tumblers before I can finish it, which will take some time.  That's ok....I rather like the journey of finding just the right fabrics.  I starch and iron the scraps, then while I'm watching TV with the family, I trace and cut them.  It's really relaxing.  Anyway...I digress.

Both of the quilts I finished in Wisconsin were small quilts.  The first one was a quilt I just recently saw in the August 2011 issue of American Patchwork & Quilting, called Sweet Carolina, designed by Annemarie Yohnk (of Quilts Remembered).  The moment I saw this quilt I wanted to drop everything and make it NOW!  Has this ever happened to you?  Well, unfortunately, I couldn't drop everything to make it right then and there, but I didn't have to wait all that long! 


Here's how my Sweet Carolina turned out....not bad, right.  Well, as I was piecing it together, I began go hate my fabric choices for the pieced and applique stems.  The leaves were a good choice, but the other greens were too weak.  I placed it on the design wall and began to work on the next project, but the more I looked at it, the stronger my feelings were.  I began to voice my concerns to my friends.  Actually....I voiced my concerns a lot.  I decided I would have to make another one...I just wasn't happy.  One of my girlfriends, truthfully I'm not sure which one, suggested that I spray the quilt with Instant Antique spray (by Primitive Gatherings) to darken the fabrics.  I thought that was an excellent idea!  What did I have to loose?  I had already resigned myself to making another one! 


We went outside and I laid the quilt on the grass and began to spray....


and spray, and spray, and spray.......


I kept spraying until the fabrics were completely saturated.  I let it dry outside a bit and then pressed it with an iron to dry completely. 


Here's how it turned out!  On the left is the before, and the right is after.  The Instant Antiquing spray darkened the greens just enough that I'm very happy with them now.  If I wanted to make the fabrics darker still, I only need to repeat the process, and apply the spray again.  I thought perhaps you'd like share this experience with me, so if you're ever in the same pickle, you have an option.  I know several quilt shop owners, designers and friends who use this product regulary.  It's very easy to use and permanent, too.  Contact Primitive Gatherings if you'd like to buy Instant Antiquing for yourself.


The second quilt I finished is this little cutie called Stepping Stones, designed by Phyllis Paul of Cozy QuartersThis quilt measures 11 x 14 inches with the blocks finishing at 3 inches.  It was such fun to make!  I wanted to make it to use in my summertime display of assorted folky strawberries!  I love how it turned out.  I think I'll try to quilt it myself....or not.  We'll see.


Over the weekend, my friends I attended a Feathered Star workshop with world reknown teacher, Marsha McCloskey.  This was my first attempt to piece a feathered star.  I was able to finished my block before the workshop ended, with 15 minutes to spare, and am very proud of how it turned out.  Marsha's techniques were awesome!  If you ever have the chance to take a workshop with her, do it!!!  You won't be sorry.... I learned so much.

*~*~*~*~*~*~*~*~*~*~*~*~*~*~*~*~*~*~*~*~*~*~*~*~*~*

Well, that's it for my non-work show-n-tell.  Stay tuned for the big reveal of all of the Journey Three projects.  The quilts are on their way back from photography, the cover will be at the printer, and I'm putting the finishing touches on all of the patterns. 

Don't forget, there will be several contests to win the pattern and kits 
(containing the exact fabrics I used in the
 quilts) of some of the Journey Three quilts...so stay tuned!!

And as always....thank you for taking a few moments to visit with me today!
Pam


Wednesday, October 19, 2011

Visiting Primitive Gatherings Quilt Shop

A few weekends ago, several of my girlfriends and I visited Lisa Bongean at her guest home, and at her quilt shop, Primitive Gatherings.  What a great time we had!!  Check out these quilty accomodations!


The house is decorated with lovely touches throughout!


Each guest bedroom has a theme.....


One more lovely than the next!


Knowing just how much hand-stitching Lisa does, it was no surprise that she
outfitted the family room with comfy chairs, perfect for curling into
with a wool project, or for binding a quilt.


With every meal, I became more and more enamored with the quilt on the wall. 
It's red-with a house after all!  How could I resist??
It was made for Lisa by her employees a few years ago....a Christmas gift.
The pattern (Welcome Home from Blackbird Designs) is no longer available except on eBay,
which is how I found my copy.


It wasn't long after our arrival when we unpacked our projects and got busy sewing.
I packed little quilt projects that have been on my personal to-do list. 
In other words, no sewing for work! 


One of the projects I brought with me was the little tumbler quilt from Tara's
book Simply Charming.  I thought it appropo since Tara was there with me...and since
I've never made a tumbler quilt before, if I ran into problems, she'd be right there
to help me!  Coincidentally, guess what project Tara brought to work on?
She's making another tumbler quilt, but with much larger tumblers this time.


I made a whole lot of progress on my little tumbler quilt (on left) and I'm loving how it's turning out.
Tara made a whole lotta progress on her quilt as well, especially when you consider that she
nearly did so with one hand tied behind her back.  Notice her left hand is bandaged.
She was recovering from minor surgery....and still produced all of those rows (on right)!!
When we're on a retreat....we're on a mission to power sew!

The tumbler quilt was one of three projects I worked on that weekend.  I'll show you the
pictures of the other two in my next post.  You'll want to check back with me
because I have an interesting story to tell!

Until then.....feed your soul with the stitches you sew!
Pam

PS...if you haven't looked into cruising to Alaska with Lynne Hagmeier and me
please do by clicking on the Cruise icon at the top of the page!
We'd love for you to join us!


Saturday, October 15, 2011

A Visit to Ye Olde Schoolhouse Quilt Shop

A few weekends ago, my friends and I stopped at Ye Olde Schoolhouse, a wonderful quilt shop in Cedarburg, WI, while on our way to Primitive Gatherings in Menasha. The shop resides in an authentic schoolhouse built in the 1800's and is the perfect setting for loads of fabrics and gorgeous quilts. I thought you'd like to see for yourself just how wonderful the shop is!


Here' shop owner, Jeanie Rudich, who's a real sweetie!


And my shopping pals Karen and Tara Darr (SewUniqueCreations). We found lots of goodies. Check out these pictures...


From there, we made our way to Menasha, where we stayed at Lisa Bongean's guest home, sewing for the weekend, and shopping until we dropped at her quilt shop, Primitive Gatherings. I'll share those photos with you in my next post.

Thanks for stopping by today....Pam

Posted using BlogPress from my iPad.

Monday, October 10, 2011

Hexagon Tutorial ~ Part Four

Finishing Tips

Now that you've been busy making hexagons, no doubt you have a wonderful assortment and want to begin sewing them together.  This was a delightful task for me as it was so very satisfying to play with them.  I loved choosing the fabrics I wanted to sew together as I began to see how the quilt would look.  Because hexagons are so perfect and precise, they go together like a dream!

Do as I say, not as I do!!

Because I was designing the quilt as I was sewing, the photos will show my progress as I worked on the quilt from the center out....not fun.  I knew I wanted to have the five light print blooms in the center but wasn't sure how big I wanted the quilt to be.  I had the design in EQ, however, it really didn't help me with a feel for the size.  Remember, this is my first hexagon quilt ever!  Please, don't start in the middle if you don't have to!!  Follow the pattern just as you would read a cross stitch pattern, meaning that you would count how many darks make up a row, sew a row together,  then add them to the quilt one row at a time.


As soon as a hexagon has been sewn on all sides, remove the paper.  It will make handling the quilt so much easier, especially on your hands!  I waited to remove hexagons, and in so doing, made it a lot harder on myself.  It was way easier to continue sewing once all of those papers were gone!  Just remember...do not remove the papers from the hexagons on the outside edges until you're finished piecing them all together.


Notice how the hexagons on the outside edge are wavy and popping up.  This is very normal!  This happens because you folded and bent the papers to get them out of your way while sewing. 
The center hexagons lay perfectly flat once the papers are removed.


Once the papers have been removed from the outer hexagons, they lay nice and flat as well.


Because of the way I basted all of the seam allowances, they lay perfectly flat.  I can tell you that my quilter was very happy about this!!  Had we basted thru the papers (ouch) we would have had to remove all of the basting stiches (ugh) to release the papers and.....our seams would have been popping up going in every which direction creating lumps, bumps, and bulk (yuck).


As for finishing the quilt, I added my borders by aligning the border fabric with
the top of the inside row of hexagons.  The borders were sewn to the quilt top
and then I removed the top half of the remaining hexagons. 

There are many other ways to finish a hexagon quilt.  Perhaps we'll get around to trying them all!

*~*~*~*~*~*~*~*~*~*~*~*~*~*~*~*~*~*~*~*~*

Elizabeth's Prairie Garden is the name of my Journey Three hexagon quilt. 
It's quilted and I'm now adding the finishing touches.  Once it's bound, I
promise to show you how it all turned out!

I sincerely hope you have found this tutorial helpful.  Hexagons were intimidating
to me for a very long time.  Once I took the plunge, I soon found there was
never any reason to be fearful. 
I hope that with these photos, instructions, and hints that you will give English Paper Piecing a try, bringing hexagons into your quilting arsenal!

As promised, I 've added a Hexagon Starter Kit to my website and
assembled the basic tools I recommended in my tutorial.

You can find it on under the Notions tab or
Click here to check it out!

Until next time.....have a great time sewing hexagons and let me know how you're doing!

Pam


Wednesday, October 5, 2011

The Great Girlfriend Get-Away!!!

It is my pleasure to announce……


The Great Girlfriend Get-Away Cruise to Alaska!!


I invite you to join me and my dear friend & fellow designer
 
Lynne Hagmeier of Kansas Troubles Quilters

on a fun filled quilting cruise to a “bucket list” destination……Alaska!


Sound like fun?  We’re planning the cruise of a lifetime filled with good times, fabulous port destinations, gourmet cuisine, and three quilt projects!

š August 19th ~ 26th, 2012

Our quilting adventure on Norwegian Cruise Lines will begin in Seattle and we’ll cruise to 5 ports-of-call:

Juneau, Skagway, Glacier Bay, Ketchikan & Victoria, BC!

During our three days at sea, you’ll be sewing three different projects while learning all of the tips, tricks, and hints we can think of to make piecing your projects a breeze!!
š You’ll spend one day at sea with Lynne, piecing her quilt Spare Change­, using Kansas Troubles precut fabrics& her unique raw edge applique! 

 
Stillwater Creek Quilt
š Then, you’ll spend a day with me, working on one of my newest quilt designs called Stillwater Creek, made with Indigo blue, bubble gum pink, and sage green prints using the Civil War Reproduction/Prairie Style fabrics we all love!  This throw size quilt will be made from a very special, brand new fabric line that isn’t out just yet. 

š On the third day, we’ll both be with you for an exclusive Girlfriend project (machine & hand piecing!) that we designed together just for the cruise, using Kansas Troubles fabrics and wool!!  We’re working on this design right now, and loving how it’s coming along so far.  Stay tuned for more news on this exclusive, special wallhanging project!
We have all kinds of ideas and surprises in store for you while you sail the seas of Glacier Bay and explore the great state of Alaska!  So, grab your girlfriends and join us!  And.well.if your husband happens to be your cruise partner.we understand.  Our husbands didn’t want to miss out on this trip either.
 
The cost of the trip includes the use of a sewing machine onboard and all three project kits.  To see all of the cruise information, click here to download our cruise brochure.  Space is very limited.so give those girlfriends a call today!
 
Want to see Lynne’s quilt Spare Change?   Click on over to Lynne’s blog for your first look at her awesome quilt and news about the Girlfriends cruise!  And remember.visit our blogs regularly to keep apprised of cruise news thru the year!

Come along with us on
The Great Girlfriend Get-Away
cruise to Alaska!  It won’t be the same without you!