


Sewing a Hexagon
Now that you have all of your tools ready, we can begin making a hexagon!!

No matter what size hexagon you decided to make, cut a piece of fabric large enough to give yourself a generous 1/4 inch seam allowance! Be sure to punch a hole in your hexagon paper
before you begin stitching.

Pin the paper to your fabric and cut a generous 1/4 inch seam allowance. Err to more seam
allowance than less. It doesn't have to be precise or accurate
at all, so eyeing it is perfectly fine.
at all, so eyeing it is perfectly fine.
A smaller seam allowance can work, but it can turn an easy job into a difficult one.
I didn't start out with these applique pins....with the nice white glass head.

I started with these little applique straight pins. They work, but as time went on they
began to hurt my fingers. I splurged a whole $6 on the better glass head pins.
Money well spent!
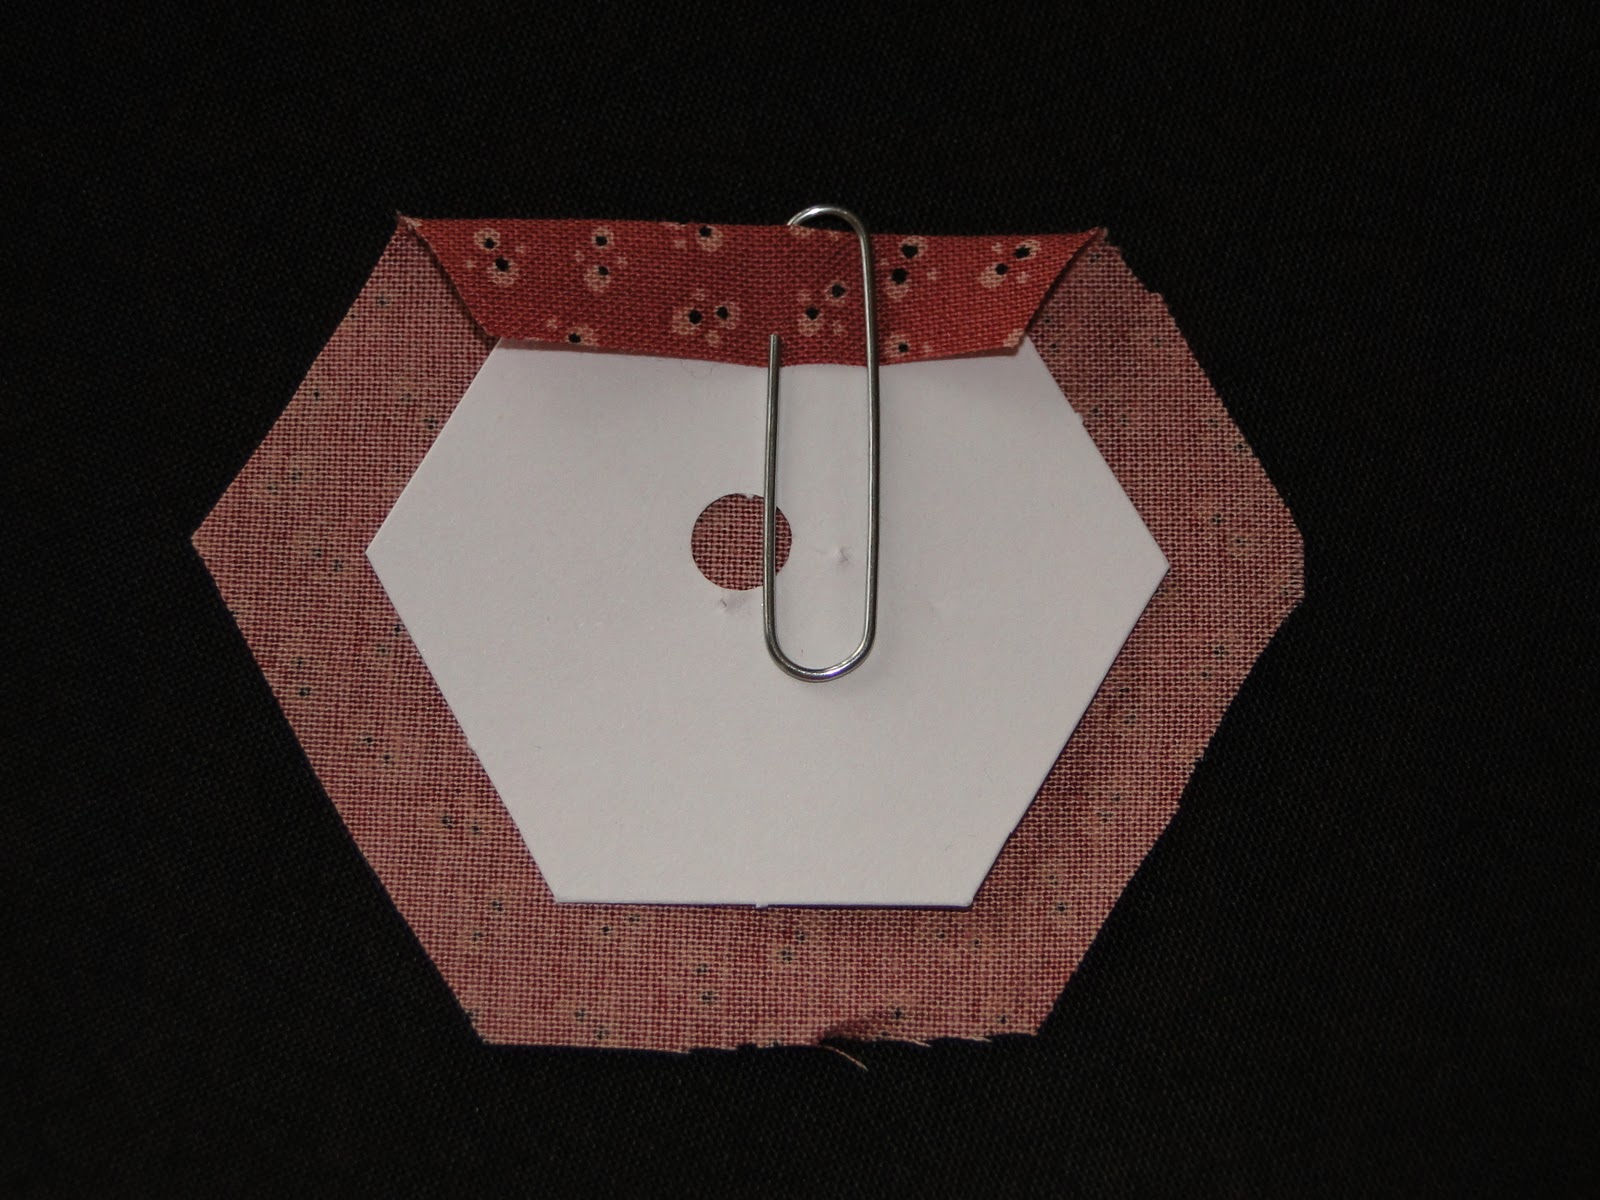
I've also seen some people use paper clips instead of pins.
I tried it but decided I liked the pins much better.
Truth be told, you don't need pins, but they really make the job easier,
in my humble opinion. Try these options for yourself and do
whatever works well for you!

Use a single strand of general purpose thread no longer than 18 inches or so.
Run the thread over the Thread Heaven, thread the needle, and tie a knot at the end.
A thread longer than 18 inches will likely just get caught on the pin
and/or the hexagon corners.
Run the thread over the Thread Heaven, thread the needle, and tie a knot at the end.
A thread longer than 18 inches will likely just get caught on the pin
and/or the hexagon corners.
Fold the top seam allowance over the paper and mitre fold the seam at the left so it fits the corner snugly. Bring your needle under the seam allowances and up thru the fabric
near the point of the hexagon.
Hints:
*You may find it very helpful to pin the top seam allowance in place. I do this because it makes for a tighter seam and...after making lots and lots of these... releases the stress of holding the fabric from your hands. This gets to be a very real concern! After I made dozens and dozens of hexagons my hands began to hurt from the pressure of holding everything in place. Save yourself the hurt and use the pins!
* Don't bring the first stitch too close to the point of the hexagon because you'll get a wonky dunce-cap kinda point from it. Better to begin a bit lower!

Take two stitches at the top of the seam. With the second stitch,
I catch the loop to make a knot. This will stop the thread from releasing the stitches
so you don't have to constantly maintain pressure on the folded seams.
I catch the loop to make a knot. This will stop the thread from releasing the stitches
so you don't have to constantly maintain pressure on the folded seams.

Bring the needle down a bit further and repeat with two more stitches,
catching the loop on the second stitch as you did before.

Rotate the hexagon and mitre the next seam to the left. Take one or two running
stitches to bring the needle across to the next point. Do not pierce the paper! These basting stitches should be made in the fabric only.

Stitch as before taking two stitches near the top, loop knot, then two more stitches
a bit further down with another loop knot.

Continue until all six seams have been turned. Knot the thread and cut!
You can remove the pin.
I didn't need to use my thimble when making the hexagons, but if your
fingers get sore, you certainly should.

One down.....that wasn't too hard, was it? They are just too cute!
You may feel all thumbs at first, but hang in there!! The thread will get caught on the corners
of the hexagon or the pin. It just will. If you get frustrated, write me a note....I will
sympathize with you! Just keep stitching!
Prepare to become addicted!
(And yes....you can blame it all on me!)
In my next post, I will cover how to stitch the hexagons together.
Happy hexagons! Pam
OMG,,I had no idea. Very cool, and easy, too!
ReplyDeleteSo incredibly easy! I take it you leave the paper on for now?
ReplyDeleteCheers!
So clear, and concise. You are talking me into it!
ReplyDeleteI'm ready to start on my hexies, have everything but Stitch Heaven. New quilt shop opening up close by tomorrow, will pick it up then. Anxious to get started, thanks again. ready
ReplyDeleteThank you, Pam, for this tutorial on hexies. I like that you don't sew through the paper--so much easier--and that there is no thread to pull out--much neater! Looking forward to the next step!
ReplyDeletePam, I love the hexagons, I am making a little one to start. I think you should have a sit-in with everyone making hexagons. Can't you just see it? It might be a world record! LOL
ReplyDeletePam..Thanks for the fabulous tutorial! Yep! I am hooked on making hexi 's.
ReplyDelete