
HomeMy WebsiteAbout mePocket PatchworkFreebie Patterns

Showing posts with label Safe Keeping Sew Along. Show all posts

Friday, May 8, 2020

Safe Keeping Sew Along ~ Part Four

Here we are....the final week of my Safe Keeping Sew along.  Week four?  Already?  These weeks seem to have flown by.

Our block this week is another favorite of mine....Cake Stand.
I adored this block long before I became a quilter.  There's something about a basket block that I just love.  Can't think of a version I don't like.
Cake Stand fabrics are from my New Circa Essentials and Bess' Flower Garden collections.
Let's get started....

Cutting Instructions for Cake Stand block


From the light print

Cut (1) 3 1/4" sq for large Half Square Triangle
Cut (1) 2 7/8" square - crosscut once diagonally
Cut (2) 2 1/4" squares for the small Half Square Triangles
Cut (2) 1 1/2" x 2 1/2" rectangles
Cut (1) 1 1/2" square

From red print

Cut (2) 2 1/4" squares for small Half Square Triangles

From black print

Cut (1) 3 1/4" square for large Half Square Triangle
Cut (1) 1 7/8" square - crosscut once diagonally

Directions

1).  Draw a diagonal line on the wrong side of (2) 2 1/4" light print squares.  Match with (2) 2 1/4" red print squares.  Sew 1/4" each side of the drawn line.  Cut apart and press to the dark.  Trim (4) Half Square Triangles to measure 1 1/2" unfinished.


2).  Draw a diagonal line on the wrong side of (1) 3 1/4" light print square.  Match with (1) 3 1/4" black print square.  Sew 1/4" each side of the drawn line.  Cut apart and press to the dark.  Trim (1) Half Square Triangle to measure 2 1/2" unfinished.  Save the remaining HST for another project.

3).  Using the (2) light print rectangles and the (2) black print triangles (previously cut once diagonally,) sew the triangles to the rectangles exactly as shown; press to the rectangle.

4).  Arrange the units for the block as shown.  Sew the small Half Square Triangle units to the large Half Square Triangles first.  Then, sew the rectangles to the HST unit, followed by the light print triangle at the bottom of the basket.  
Your Cake Stand block should measure 4 1/2" square.
Safe Keeping Runner 
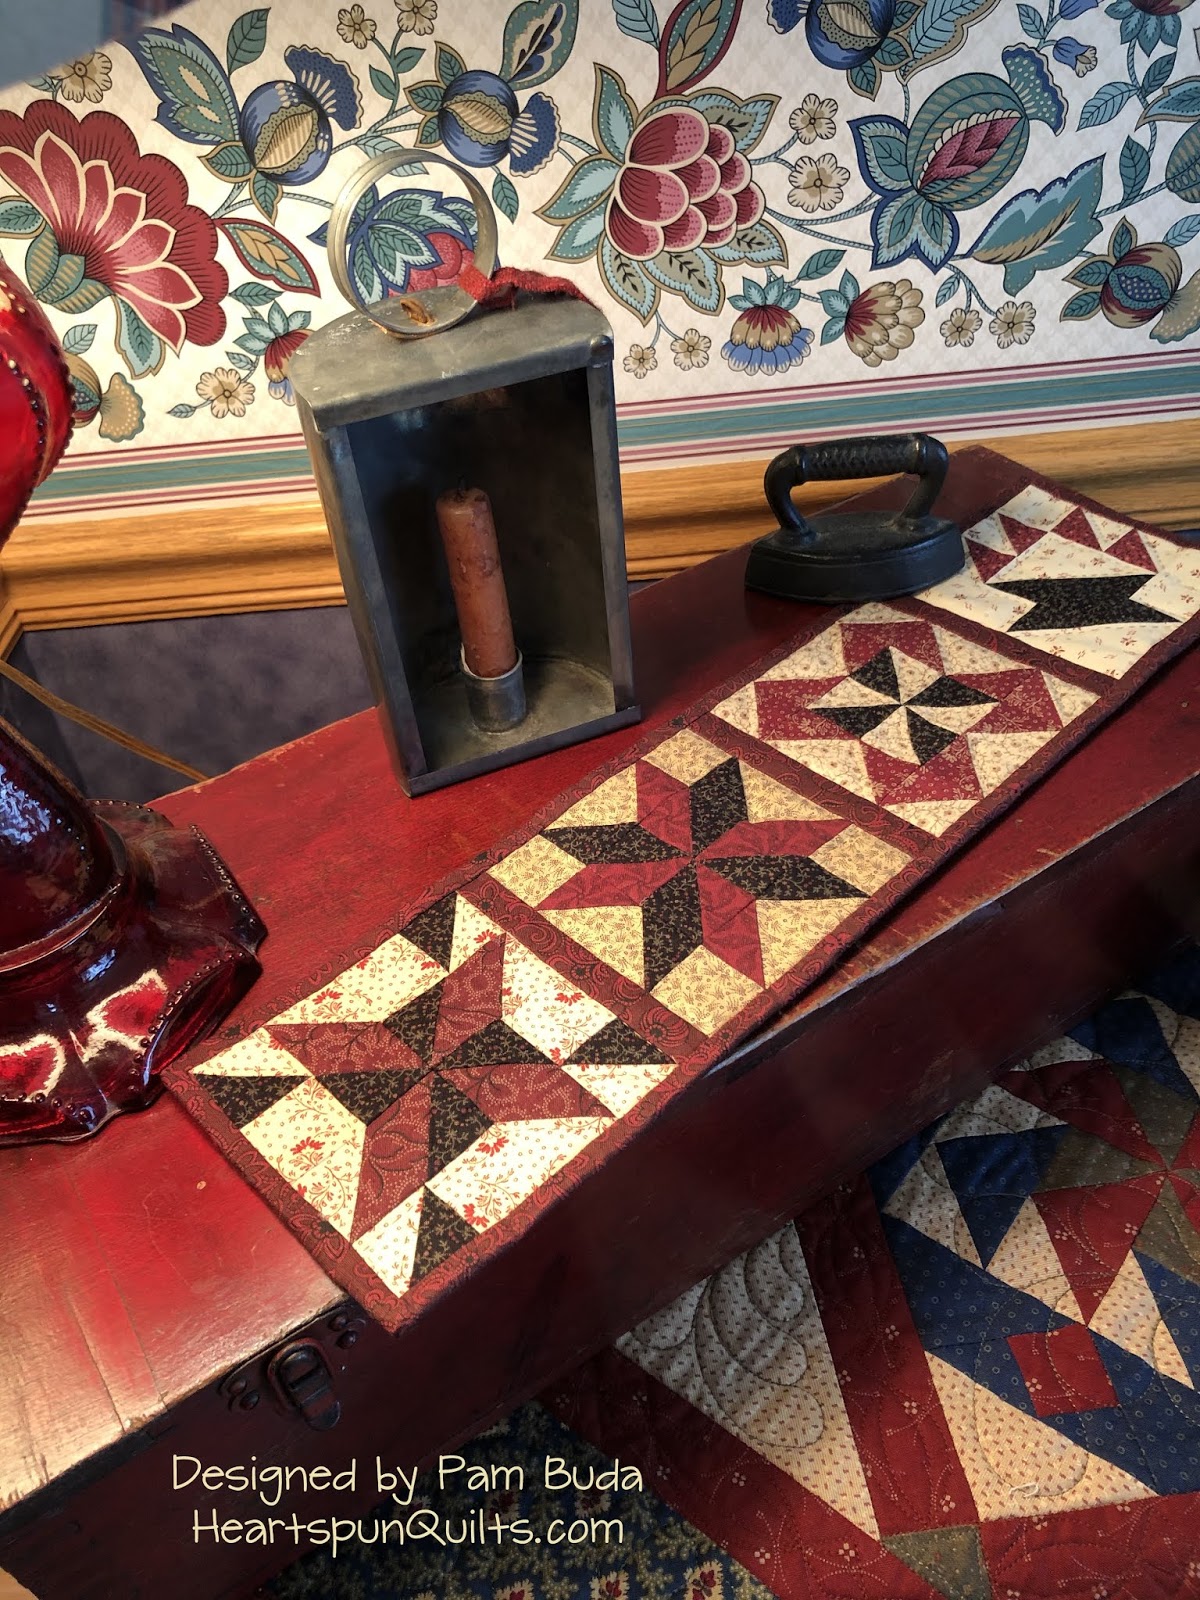
Here's what you've been making!  I separated my blocks with (3) 1" x 4 1/2" strips.  I auditioned the black and light prints but chose red strips for my quilt.  You should audition fabrics for your strips, too.  Red seemed to work the best for me for the binding as well.  Cut (2) 1 7/8" x WOF binding strips.

Do you like it?  Oh, I hope you love your scrappy little runner!
These little runners seem to work well in numerous places in my house.  
This antique spool cabinet is right next to my favorite family room chair.  After awhile, I get tired of looking at the same 'ol quilt and like to change things up.  Easy to do with a little runner like this.  
You can move them all over the house...even the kitchen near the stove.  

I hand quilted my runner because I love hand quilting.  You can easily machine quilt this baby, too.  I would love to see your Safe Keeping runner when completed.  Please post to your favorite social media using hashtag #SafeKeepingRunner 
That way, we can all see them anytime!  

It is my pleasure to bring fun, little projects for your stitching pleasure as a big, giant THANK YOU for all you do for me!!!! Please know how I appreciate your support, patronage of my business, emails, blog, Instagram and Facebook comments.  You keep me in business to be able to keep doing what I love, and hopefully what you love, too!  Thank you, thank you!
My next Quilt Archaeology kick-off will be May 22nd.  

In the meantime, did you know my friends at Red Crinoline Quilts are about to start a series of Monthly Mini Mystery quilts??  YES!!!  They don't often do mini's, so I intend to get them all!  The first mini is coming Monday, May 11th.  Check out the details here.

As we begin another weekend, stay safe and create at home.
I sincerely hope this sew along has brightened your day.  I'd love to read a comment from you.

I encourage you to follow me on Instagram and Facebook for behind-the-scenes posts that don't appear here on the blog.  

Be well, my friends....keep on stitching!

Friday, May 1, 2020

Safe Keeping Sew along ~ Part Three

This is the third week of my Safe Keeping sew along.  Already?!
It seems time has flown when you think of this as week three, yet in so many ways, time seems to be standing still right now as we so wish this horrible virus would go away!  

Well...I'm hoping this little sew along is helping to keep you busy with something you enjoy doing.  

This weeks block is also a favorite for me.....
Colorado Beauty
It's very similar to the LeMoyne Star in the units we make for it.  Relatively easy, especially when I don't screw up the cutting instructions!  Sorry about that!  

Cutting Instructions for Colorado Beauty block:

From the light print
Cut (4) 2 1/4" squares for Half Square Triangles
Cut (4) 1 1/2" x 2 1/2" rectangles for Flying Geese

From the red print
Cut (2) 2 1/4" squares for Half Square Triangles
Cut (8) 1 1/2" squares for Flying Geese

From the black print
Cut (2) 2 1/4" squares for Half Square Triangles

Directions

1).  Draw a diagonal line on the wrong side of (4) 2 1/4" light print squares.  Match (2) with a 2 1/4" black print square, and (2) with red print squares.  Sew 1/4" each side of the drawn line.  Cut apart and press to the dark.  Trim (8) Half Square Triangles to measure 1 1/2" unfinished.

2).  Sew (4) black and light print Half Square Triangles into a Pinwheel unit measuring 2 1/2" square.

3).  Draw a diagonal line on the wrong side of (8) red print 1 1/2" squares.  Using the Connector Corner method, sew the red print squares to a 1 1/2" x 2 1/2" light print rectangle; press and trim.  Repeat on the other side of the rectangle with the remaining (4) red print squares.  Make (4) Flying Geese measuring 1 1/2" x 2 1/2" unfinished.  

4).  Arrange the units for the block as shown in the photo above.  Sew together into rows; press to Flying Geese units.
Sew rows together; press.  Your block should measure 4 1/2" square.
I received a few emails asking what fabric collections I used in making my blocks.  The reds come from Bess' Flower Garden.  Some of the backgrounds come from Bess as well.  The black print and the background in this week's block are from New Circa Essentials.  All are still available on my website....just in case they are call you.  

My quarantine organization continues.  It's getting boring now, but I carry on as this is the best time to do this.  Once the weather is nice here, I won't be doing anything like that until the fall.  So...I make myself continue up to one hour a day.  Little by little, it will get done.  What is keeping you busy?

Next month, I will be hosting another.....
I sure hope you join me!!  

You'll see the first sneak peeks on Instagram and Facebook, so please follow me there.  Once I decide on an official start date, I'll be sure to post that info here as well and a peek at the antique quilt we will replicate.  

In the meantime, have a wonderful weekend.  Next Friday is our last block and the reveal of what our sweet little scrappy runner looks like.  

Stay safe and keep creating!  Be well....