HomeMy WebsiteAbout mePocket PatchworkFreebie Patterns

Showing posts with label Hand Applique by Machine. Show all posts

Saturday, November 13, 2010

Hand Applique by Machine ~ Lesson Three

Sewing the Applique by Machine

Now that your applique is all prepared, we're ready to stitch it in place.  Remember, at this point, you can easily hand-stitch if you'd like to.  Here's how to stitch it using your sewing machine!


Begin by placing the applique exactly where you want it to be on your background fabric.  Holding it in place, lift half of the applique and dot with Roxanne's Glue Baste-It.  (By using Roxanne's, your applique will be tacked to the backgound fabric and you won't have to deal with any pins while sewing.  This is a water soluable product that is very safe for your fabrics.)  Gently press the applique in place.  Repeat for the other half of the applique.

You have some decisions to make regarding the thread you want to use. 

*You should choose a cotton thread, in a color that will match the background fabric, for the bobbin.

*You can choose a cotton thread, in a color that will match your applique, for the top.  Choose a color that closely matches the applique so that it will disappear.  This often means that you will need to change thread colors from piece to piece. 

*Another alternative for the top thread is to use a good quality mono-filament thread.  That way, you don't have to change colors from piece to piece.  Mono-filaments come in two colors: clear and smoke.  Use the clear for light color fabrics and the smoke for medium & dark color fabrics.  The reason for the two colors is to better hide the reflection of the thread against the fabrics.  The reflection of the clear thread will show up more on dark fabrics.  I never ever recommend using a mono-filament in the bobbin.  That's just me!

*It is very, very helpful to use an open-toe foot for this technique.  It allows you to see more of what you're doing!


Once the applique is glued into place, stitch it using the Blind Hem stitch shown above.  You should play with the settings of the length and width. 

The length should be shorter, or closer together, for smaller appliques, and can be longer, or farther apart for larger appliques. 

The width of the tacking stitch should cross over the fabric just enough to jump the fold.  If it is more than that, it will be more noticeable. 

Use your needle-down option and pivot often.


The stitch is ideal when the needle is landing exactly at the right of the fold, and the tack stitch is small enough to catch the fabric, but not so large as to be seen.  Back-tack your stitches when you come to the end.

Sorry this isn't a better photo, but I wanted to show you how the stitching looks from the back. 


Those are the basics of the technique.  I hope this tutorial will help you in some way.  This method has really worked for me and enabled me to make the applique quilts I wanted to make.

Enjoy your weekend!
Pam

P.S.  Sorry for the poor quality photos.  I'm working on taking better ones!  Please bear with me.

Monday, November 8, 2010

Hand Applique by Machine ~ Lesson Two

Ready for the next step?  Here we go...

Turning the Seam Allowance
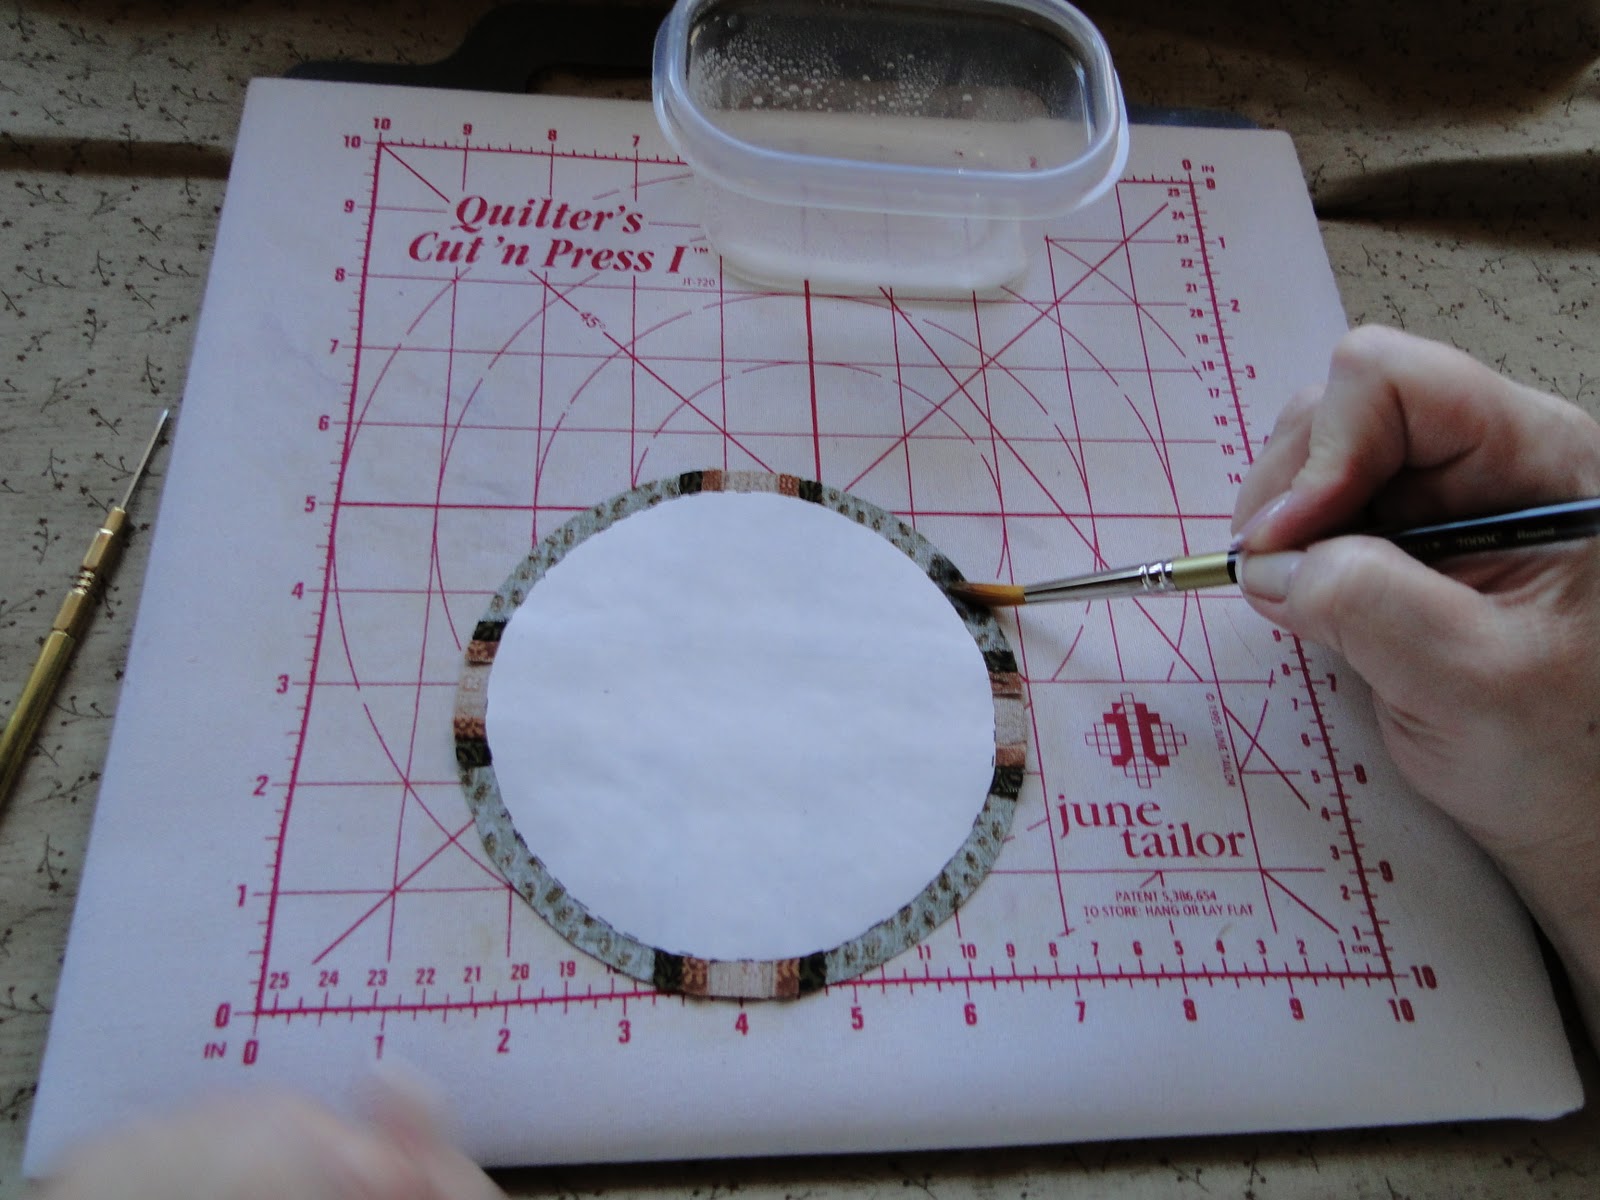
You'll need a few basic tools as shown in the photo above.  Gather the following items:

* A pressing surface.  I use the June Tailor Cut 'N Press because I like to work on the appliques at a counter in my sewing room, but your ironing board will work as well.

* A small container.  A deli container works nicely, or whatever you have handy.

* A can of spray starch.

* A brush.  This should be a natural bristle brush because a nylon brush lets the starch just run out of the bristles.  A natural bristle brush holds the starch, then releases it evenly.  I use a Lowe-Cornell number 8 round brush (which is actually tapered nicely at the tip).  They are about $10 at Michaels.  Use your 40% coupon!  It's worth it!!

* A Clover mini iron.  You may wonder about this iron, but it really is necessary.  You can try to use a regular size iron, but you'll struggle with it and it just doesn't work well.  It's worth the investment.  Your local quilt shop can get this item for you.

* A Stiletto.  Also very necessary.  Don't try to substitute using a seam ripper or bamboo stick.  They just don't work.  Believe me, I've tried and many of my students have tried.  Your quilt shop can get this also.

Five simple items are all you need for this technique.  It's a small investment for the tools, but remember you'll have them for years.  But first....read on to see if you like the technique!

Spray some starch into the container. 


Begin "painting" the starch onto the seam allowance.  It's very important that you try to keep the freezer paper dry.  It's not a tragedy if you wet it some, but try not to.  The freezer paper needs to be dry and stiff so it can form your applique shape.  You can paint as much of the seam allowance as you want.  I generally keep a couple of inches wet ahead of where I'm working.


Using your stiletto in your left hand, bring the seam allowance over the freezer paper.  This will feel weird....all thumbs at first.  Practice a bit.  It becomes second nature in no time!  Promise!


While you're holding the seam securely in place with the stiletto, bring the iron just to the area you've folded.  Hold it there until it's dry.  When dry, the starch will keep the seam folded over.


Continue working around the entire circle, adding gathers in the fabric when needed.  If you get points, peaks, and divots, don't worry!  Just wet them with the starch and use your stiletto to smooth them over, then repress them dry.


 Your applique will look like this when it's finished.

Now, here's the best part!  When you're ready to stitch the applique, remove the freezer paper before stitching it in place!!  Yes, before stitching!  This is why I love this technique.  I don't want to be fooling around with cutting the back of the block/applique after stitching.  I don't want to submerge my work in water to get the paper out!  No need with this technique. 

The seam allowance stays folded.  Now, I can stitch by hand if I prefer, or by machine.  I've done both.  The applique itself is soft and pliable, just like needle-turn would be. 

Stay tuned for the last lesson.  I'll show you how to stitch your applique with your machine so it's barely visible.   Please let me know what you think so far? 

As with any new skill, practice makes perfect.  If you're in the Chicagoland area, I will be teaching this technique in a workshop on March 26, 2011 at The Quilt Merchant in Winfield, IL.  I'd love to have you join us!

*~*~*~*~*~*~*~*~*~*~*~*~*~*~*
I wanted to answer the question about stabilizer....there is no need for a stablizer as the freezer paper is, in essence, a stabilizer.  The freezer paper is also wonderful in that you can mark your pieces, make notes, arrows, etc, to aid you in assembly.  Remember, too, that if things aren't working out with a particular piece, you can always remove the freezer paper, press your fabric and start over!  I encourage you to try this and practice a bit.  The learning curve isn't bad a all!

Wednesday, November 3, 2010

Hand Applique by Machine ~ Lesson One

Hello everyone!

Blackbird Designs Trick or Treat basket block
Until about a year and half ago, I didn't think I'd ever learn needle-turn applique!  I didn't think I'd have the patience for it....but then, Blackbird Designs book, When The Cold Wind Blows came out and I fell madly in love with the little basket blocks.  I adore basket blocks!  While at a quilt guild function, I had an opportunity to learn needle-turn applique from a fellow guild member, and make one of these basket blocks.  I was smitten!!  I've been making these blocks ever since, and to date, have 66 of the needed 297 blocks finished.  It may take me several years to complete all of the blocks, but that's OK!  I'm thoroughly enjoying the journey.  Still, I don't think that traditional needle-turn will be something I strive at, although I'm happy to have the skills now. 

Many years ago, I learned the following method of applique, which gives the appearance of needle-turn.  It's faster, keeps the applique soft and pliable, gives you the option of hand or machine stitching, and removes the freezer paper from the back before stitching it in place!  It's good to have several  techniques in your stitching arsonal!

As promised, here is the first demo of how I get the look of needle-turn hand applique without the hand work.  Since the Remember Me block is a nice, easy circle, I'll demonstrate with that block, but know that I use this technique for any and all applique shapes and sizes.

Preparing the Applique

Trace the applique shape, including the dotted line, onto the paper side of a piece of freezer paper.   (The dotted line is an added steps for this project only.)  For this method, you don't have to reverse your applique. 

Cut the shape out on the solid line. For this block, cut the applique on the outer line only for now. 


With the waxy side against the fabric, press onto the wrong side of your fabric/block.


Trim the block into a circle, removing the excess fabric.


Lift and separate the freezer paper from from the fabric all around the edges of the circle, keeping it attached in the center.  Cut the freezer paper off on the dotted line.  Repress the freezer paper to the fabric. 

This gives you the 1/4 inch seam allowance, and the block is ready for the next step.

The first solid line of the circle template easily enables you to center the circle more precisely on the block since it extends from edge to edge.  Trimming the freezer paper on the dotted line then allows you to accurately trim a quarter inch seam allowance.  Normally when I use this method for applique, I trace the shape onto the freezer paper, cut it out on the line, iron to the wrong side of the fabric, then give myself a seam allowance when I cut it out. 


Stay tuned for Lesson Two coming soon!
Pam